Welcome to the Linea Project’s 3rd week tasks! Whether you’re a beginner or an experienced developer, this guide will walk you through the steps necessary to successfully complete this week’s tasks. The Linea Project is an exciting opportunity to improve your coding skills and contribute to a significant open-source project.
Before diving into the tasks, make sure you have a basic understanding of HTML, CSS, and JavaScript. Familiarize yourself with the Linea Project’s documentation, which can be found on their website. This will provide you with valuable information about the project’s goals, features, and coding standards.
This week’s tasks will focus on implementing a responsive design for the Linea Project’s website. You will be using CSS media queries to ensure that the website looks great on different devices and screen sizes. Additionally, you will optimize the website’s performance by minifying CSS and JavaScript files, and implementing caching techniques.
To get started, clone the Linea Project’s repository from GitHub and set up a development environment on your local machine. Make sure you have a code editor and a web browser installed. Once you have everything set up, create a new branch to work on the tasks. It’s always a good practice to keep your changes separate from the main codebase.
Now that you’re all set up, let’s dive into the tasks. The first task is to create a responsive navigation bar. You can achieve this by using CSS flexbox or CSS grid. Make sure the navigation bar looks good on different screen sizes and collapses into a hamburger menu on smaller devices. Add appropriate hover and active states to make the navigation bar interactive.
The second task is to implement responsive layouts for the main content of the website. Use CSS media queries to rearrange the content and adjust its size and spacing based on the screen size. Keep in mind the mobile-first approach and make the website’s content legible on smaller screens.
The final task is to optimize the website’s performance. Minify the CSS and JavaScript files to reduce their size, resulting in faster load times. Implement caching techniques to minimize the number of HTTP requests made by the browser. Consider using tools like Gulp or Webpack to automate these processes.
Once you have completed all the tasks, thoroughly test your changes on different devices and browsers to ensure everything is working as expected. Finally, create a pull request on GitHub and await feedback from the project maintainers. Congratulations on completing the Linea Project’s 3rd week tasks!
Defining the Weekly Objectives
Each week of the Linea Project brings new tasks and goals to accomplish. This step-by-step guide will provide a clear overview of the weekly objectives for the 3rd week of the project.
Objective 1: Conduct Research
The first objective for this week is to conduct thorough research on the assigned topic. This includes gathering relevant information from reliable sources such as academic journals, books, and credible websites. Make sure to take notes and organize the gathered data for later use.
Objective 2: Analyze Data
Once the research is completed, the second objective is to analyze the gathered data. This involves identifying patterns, trends, and key insights from the research. Utilize tools and resources such as spreadsheets or statistical software to assist in the analysis process.
Note: It is essential to approach data analysis objectively and draw conclusions based on evidence.
Objective 3: Create a Plan
After analyzing the data, the next objective is to create a plan. This plan should outline the steps needed to complete the project successfully. It should include tasks, deadlines, and responsibilities assigned to each team member.
Tip: Make sure the plan is comprehensive, realistic, and adaptable to potential challenges or changes.
By defining your weekly objectives and following this step-by-step guide, you will be well-prepared to complete the Linea Project’s 3rd week tasks efficiently and effectively.
Creating a Detailed Task List

When embarking on any project, it is crucial to have a detailed task list in place. This will help you stay organized and ensure that all necessary steps are completed. In this article, we will guide you through the process of creating a task list for the Linea Project’s 3rd week tasks.
Step 1: Identify the Main Goals
Start by identifying the main goals that need to be achieved in the 3rd week of the Linea Project. This could include tasks such as designing the user interface, implementing backend functionality, or conducting user testing. Make sure to list all the main goals so that you have a clear understanding of what needs to be accomplished.
Step 2: Break Down the Goals into Subtasks
Once you have identified the main goals, it is time to break them down into smaller, more manageable subtasks. For example, if one of your main goals is to design the user interface, the subtasks could include creating wireframes, selecting color schemes, and designing icons. Be as specific as possible when breaking down the goals to ensure that no steps are missed.
Remember to prioritize the subtasks based on their importance and dependencies. Some subtasks may need to be completed before others can progress, so make sure to take that into account when creating your task list.
Step 3: Assign Deadlines and Resources
Assign deadlines to each of the subtasks to keep yourself on track and ensure that the project is progressing smoothly. Be realistic when setting deadlines and take into account any external factors that may affect the timeline.
In addition to deadlines, consider the resources you will need for each subtask. This could include software, tools, or team members with specific skills. Assigning resources will help you allocate your time and ensure that you have everything you need to complete each task.
Pro Tip: Utilize project management software or tools to help you keep track of your task list. These tools often have features that allow you to set deadlines, assign resources, and track progress, making it easier to stay organized and focused on your goals.
Step 4: Review and Refine
Once you have created your task list, take the time to review and refine it. Make sure that all steps are included, and nothing has been missed. Consider any feedback or input from team members and make adjustments as needed.
Remember that the task list is a dynamic document and can be updated as the project progresses. Regularly review and adjust the task list to reflect any changes or new information that may arise.
By following these steps and creating a detailed task list, you will be well-prepared to tackle the Linea Project’s 3rd week tasks. Stay organized, stay focused, and you will achieve your goals efficiently and effectively.
Assigning Tasks to Team Members
Assigning tasks to team members is a crucial part of successfully completing the Linea Project’s 3rd week tasks. By effectively assigning tasks, you can ensure that each team member knows what is expected of them and can work towards completing their assigned tasks in a timely manner.
Here are the steps to follow when assigning tasks to team members:
- Begin by reviewing the project requirements and breaking them down into smaller tasks or milestones.
- Identify the skills and strengths of each team member to allocate tasks that align with their abilities.
- Consider the workload and availability of each team member to evenly distribute the tasks and prevent overloading.
- Clearly communicate the tasks to each team member, providing detailed instructions, deadlines, and any necessary resources.
- Encourage collaboration and teamwork by assigning tasks that require cooperation between team members.
- Monitor the progress of each task regularly to ensure that everything is on track and address any issues or challenges that arise.
- Provide support and guidance to team members throughout the task completion process.
- Recognize and appreciate the contributions of each team member upon successful completion of their assigned tasks.
By following these steps and effectively assigning tasks to team members, you can maximize productivity, promote teamwork, and ultimately achieve success in completing the Linea Project’s 3rd week tasks.
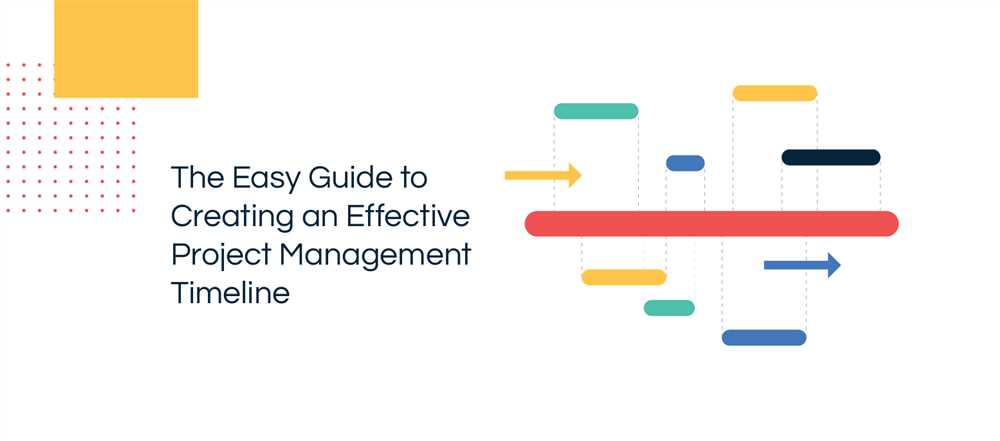
Setting Up a Project Timeline
Creating a project timeline is a crucial step in effectively managing and completing any project. A timeline provides a visual representation of the project’s milestones and deadlines, helping you stay organized and on track.
Step 1: Identify Project Milestones
The first step in setting up a project timeline is to identify the key milestones for your project. These milestones are significant events or deliverables that mark progress and help you track the project’s success. Examples of milestones may include completing research, designing prototypes, or conducting user testing.
Listing these milestones will not only help you determine the overall timeline for your project but also provide a framework for scheduling tasks and assigning responsibilities.
Step 2: Estimate Task Durations
Once you have identified the project milestones, the next step is to estimate the duration of each task required to reach those milestones. This involves breaking down the project into smaller, manageable tasks and assigning time estimates to each one.
When estimating task durations, it’s important to consider factors such as dependencies, available resources, and potential roadblocks. Be realistic in your estimations to ensure that the timeline is achievable and allows for unexpected delays or issues.
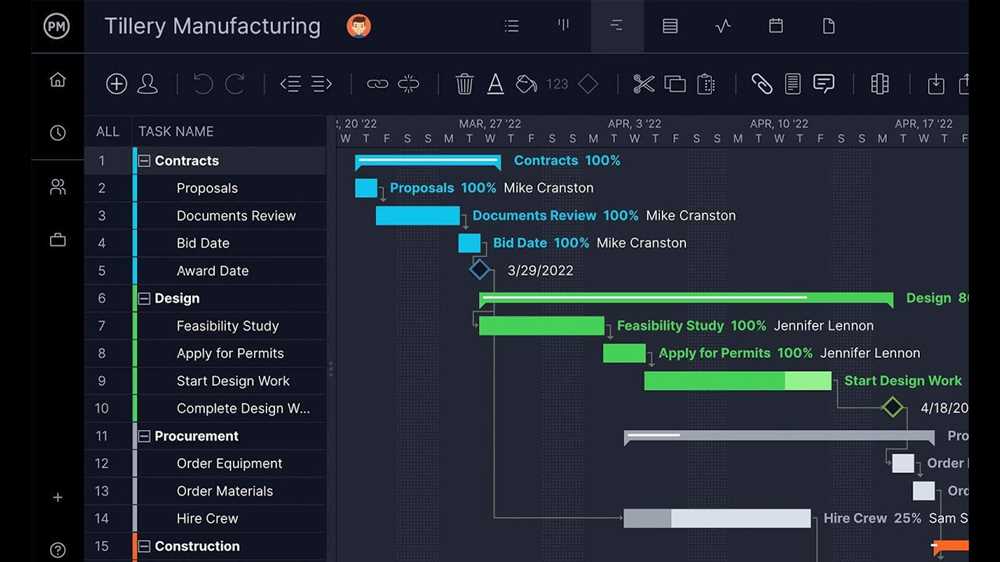
Step 3: Create a Gantt Chart or Project Schedule
With the milestones and task durations determined, it’s time to create a project timeline. One effective way to visualize the timeline is by using a Gantt chart or project schedule.
A Gantt chart displays the timeline of the project in a horizontal bar chart format. Each task is represented as a bar, with its length indicating the estimated duration. The chart also shows dependencies between tasks and the overall project timeline.
If you prefer a simpler format, a project schedule can be created using a table. In the table, each row represents a task, and the columns display the start and end dates, duration, and assigned resources.
Whichever format you choose, make sure to include all the identified milestones, tasks, and their corresponding durations. This will provide a clear roadmap for the project’s execution and help you monitor progress.
Remember that a project timeline is not set in stone and may require adjustments as the project progresses. Regular monitoring and updates are essential to ensure that the project stays on track and any deviations are promptly addressed.
| Milestone | Tasks | Estimated Duration |
|---|---|---|
| Research Phase | Conduct market research | 2 weeks |
| Design Phase | Create prototypes | 3 weeks |
| Development Phase | Code and test features | 4 weeks |
| Testing Phase | Conduct user testing | 2 weeks |
| Finalize Product | Implement feedback and make final adjustments | 1 week |
Monitoring Progress and Making Adjustments
Monitoring the progress of your project is crucial to ensure its successful completion. By regularly evaluating the tasks and milestones achieved, you can identify any potential issues or delays and take appropriate measures to address them. This will help you stay on track and meet your project goals within the set timeline.
Tracking Task Completion
One way to monitor progress is by tracking the completion of individual tasks. Create a task tracking system, whether it’s a simple spreadsheet or a project management tool, to record the status of each task. Update this regularly as tasks are completed, allowing you to visualize the progress made and identify any tasks that may be falling behind schedule.
Reviewing Milestones
Milestones act as significant points in your project timeline. Reviewing milestones regularly can give you a clear picture of how well your project is progressing overall. Identify key deliverables and set deadlines for each milestone. During your progress review, check if the milestones have been achieved or if there are any delays. Adjust your project plan accordingly to ensure that you stay on track.
Communicating with Team Members
Regular communication with your team members is essential for effective monitoring. Keep an open line of communication, providing updates on the project’s progress and any adjustments made. Encourage your team to share their feedback and concerns, as they can provide valuable insights and help identify areas that need improvement.
Remember: Adjustments may be necessary throughout the project, especially if unforeseen challenges arise or if the initial plan needs modification. Stay flexible and ready to adapt to changes, making necessary adjustments to keep your project on track and ensure its successful completion.
Question-answer:
What is the Linea Project’s 3rd Week Tasks?
The Linea Project’s 3rd Week Tasks refer to the specific tasks that need to be completed during the third week of the Linea Project. These tasks may involve specific assignments, deadlines, or goals that are set for the team working on the project during this week.
Do the Linea Project’s 3rd Week Tasks differ from the tasks of the previous weeks?
Yes, the Linea Project’s 3rd Week Tasks are likely to be different from the tasks of the previous weeks. Each week of a project usually involves a new set of tasks and goals that build upon the progress made in the previous weeks. The tasks for the third week may be more advanced or focused on specific aspects of the project.
What are some examples of the tasks that may be included in the Linea Project’s 3rd Week Tasks?
The tasks for the Linea Project’s 3rd Week may vary depending on the nature of the project. However, some examples of tasks that may be included are: conducting user research, creating wireframes or prototypes, analyzing data or feedback from previous weeks, refining the project plan or strategy, implementing design or development changes, preparing for a project presentation or demo, or collaborating with team members on specific project deliverables.