Welcome to Galxe ID, the ultimate platform for managing your digital assets! If you’re looking to add a second EVM (Ethereum Virtual Machine) wallet to your Galxe ID account, you’ve come to the right place. Adding a second wallet allows you to keep your funds separate and manage them with ease.
To add a second EVM wallet to your Galxe ID account, follow these simple steps:
Step 1: Log in to your Galxe ID account. If you don’t have an account, you can easily create one by signing up on our website.
Step 2: Once you’re logged in, navigate to the “Wallets” section in your account dashboard. Here, you’ll find a list of your current wallets.
Step 3: Click on the “Add Wallet” button to start the process of adding a second wallet.
Step 4: Choose “EVM Wallet” as the type of wallet you want to add. This will ensure compatibility with the Ethereum Virtual Machine network.
Step 5: Enter the necessary information for your second EVM wallet, such as wallet name, address, and private key. Make sure to double-check the accuracy of the information before proceeding.
Step 6: Click on the “Add Wallet” button to complete the process. Congratulations! You have successfully added a second EVM wallet to your Galxe ID account.
Note: Adding a second EVM wallet allows you to seamlessly manage multiple wallets within a single platform. However, it is important to keep your private keys safe and secure to protect your funds. Always exercise caution and use reliable security measures when managing your digital assets.
Now that you have a second EVM wallet added to your Galxe ID account, you can easily switch between wallets, send and receive funds, and monitor your transactions with convenience. Enjoy the enhanced flexibility and control over your digital assets with Galxe ID!
Step 1: Access your Galxe ID Account
To add a second EVM wallet to your Galxe ID account, you first need to access your account. Follow the steps below:
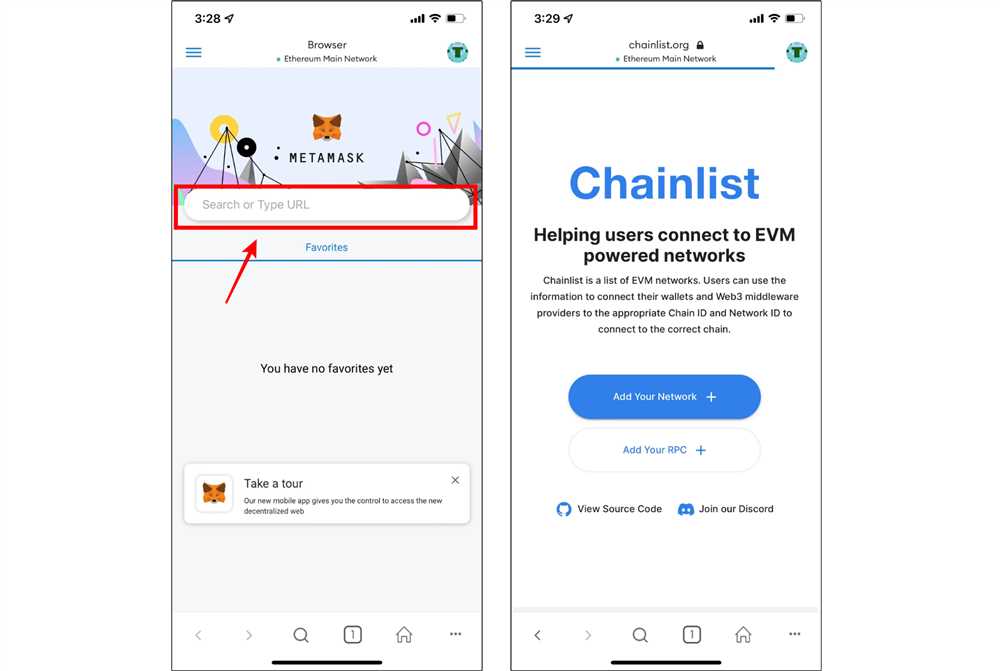
| 1. | Open your preferred web browser and go to the Galxe ID website. |
| 2. | Click on the “Login” button located at the top right corner of the homepage. |
| 3. | Enter your Galxe ID username and password in the appropriate fields. |
| 4. | Click on the “Sign In” button to access your Galxe ID account. |
Once you have successfully logged in, you are ready to proceed to the next step of adding a second EVM wallet to your Galxe ID account.
Step 2: Navigate to the Wallet Section
Once you have successfully logged into your Galxe ID account, you will need to navigate to the Wallet section in order to add a second EVM wallet. Follow the steps below to complete this process:
Step 2.1: Access Your Account Settings
At the top-right corner of the Galxe ID interface, you will find your account profile picture or icon. Click on it to reveal a dropdown menu. From the options displayed, select “Account Settings” to access the settings page.
Step 2.2: Open the Wallet Section
After accessing your account settings, you will be presented with various sections related to your Galxe ID account. Scroll down until you find the section titled “Wallets” and click on it to expand it.
Step 2.3: Add a Second EVM Wallet
Within the Wallets section, you will see a table displaying your current EVM wallet (if you have one). To add a second EVM wallet, locate the option to “Add Wallet” and click on it. A new dialogue box or form will appear, allowing you to enter the necessary details for the new wallet.
| Field | Description |
|---|---|
| Wallet Name | Enter a name for the new wallet. This is for your reference and will not affect the functionality of the wallet. |
| Wallet Address | Enter the address of the second EVM wallet that you want to add. Double-check the address to ensure its accuracy. |
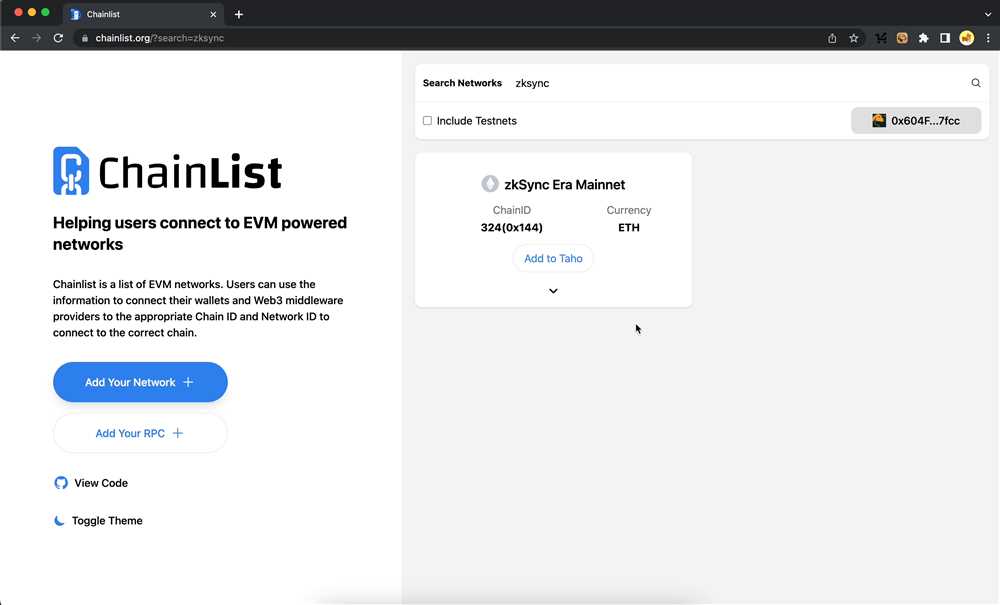
| Wallet Type | Select the type of EVM wallet that you are adding. This can include popular options such as MetaMask, Trust Wallet, or any other EVM-compatible wallet. |
| Network | Select the Ethereum network to which the wallet belongs. This can be Mainnet, Testnet, or any other network that you are using. |
| Once you have filled in the required details, click on the “Add” button to add the second EVM wallet to your Galxe ID account. |
Congratulations! You have successfully navigated to the Wallet section and are ready to add a second EVM wallet to your Galxe ID account. Move on to the next step to complete the process.
Step 3: Add a Second EVM Wallet

Now that you have successfully set up your Galxe ID and added your first EVM wallet, it’s time to add a second EVM wallet. Adding multiple wallets can be convenient if you have different wallets for different purposes, such as personal transactions and business transactions.
Here’s how you can add a second EVM wallet:
- Open the Galxe ID application on your device and log in with your credentials.
- In the main menu, go to the “Wallets” section.
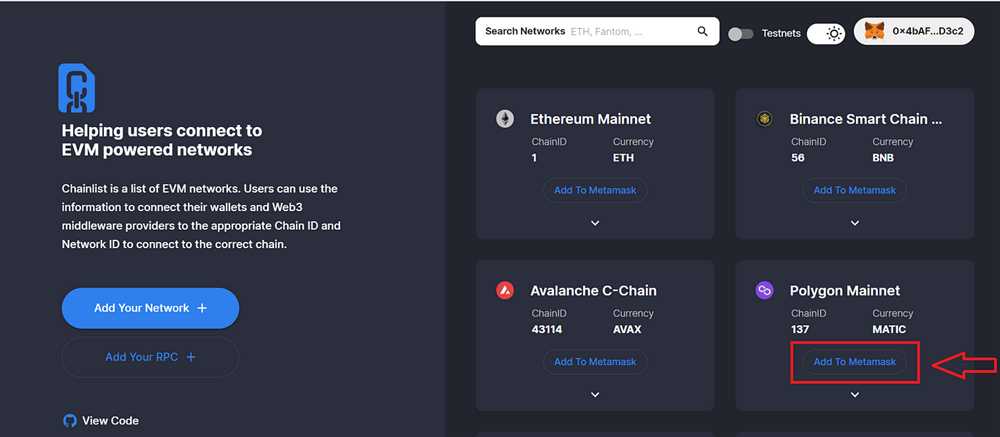
- Tap on the “Add Wallet” button.
- Choose the EVM wallet option.
- Enter a name for your wallet to easily identify it (e.g., “Personal Wallet”).
- Enter the wallet’s address or scan the QR code if available.
- Click on the “Add Wallet” button to proceed.
- After adding the wallet, you will see it listed under the “Wallets” section in your Galxe ID application.
- To switch between wallets, simply tap on the desired wallet from the list.
It’s important to note that each added wallet will have its own unique address and private key. Be sure to keep your private keys secure and backed up to avoid losing access to your funds.
By following these steps, you can easily add a second EVM wallet to your Galxe ID application. This will allow you to manage multiple wallets and access your funds conveniently.
Question-answer:
What is Galxe ID?
Galxe ID is a mobile application that provides users with a secure and convenient way to manage their digital identities and associated assets. It supports various blockchain networks and allows users to add and manage multiple wallets for different cryptocurrencies. With Galxe ID, users can easily transact, sign messages, and interact with decentralized applications.
Can I add more than two EVM wallets to Galxe ID?
Yes, you can add more than two EVM wallets to Galxe ID. The application allows users to add and manage multiple wallets, providing flexibility and convenience in managing their digital assets. Simply follow the same steps outlined in the article to add additional EVM wallets to your Galxe ID.
Is Galxe ID available for both iOS and Android devices?
Yes, Galxe ID is available for both iOS and Android devices. You can download the application from the respective app stores – the App Store for iOS devices and the Google Play Store for Android devices. Make sure your device meets the system requirements specified by Galxe ID to ensure compatibility and optimal performance.