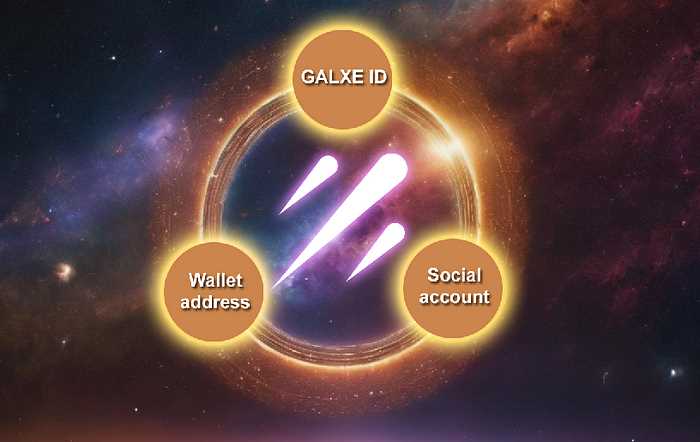
Are you tired of managing multiple accounts and wallets for your social media platforms? Galxe ID has the solution for you! With Galxe ID, you can now connect all your social media accounts and wallets in one place, making it easier than ever to manage your online presence and digital assets.
Galxe ID is a revolutionary platform that allows you to link your social media accounts and wallets seamlessly. Whether you want to connect your Facebook, Instagram, Twitter, or TikTok accounts, Galxe ID has got you covered. Say goodbye to the hassle of logging in and out of different accounts and keep all your social media activities in one convenient location.
Not only does Galxe ID make managing your social media accounts easier, but it also provides added security for your digital assets. By linking your wallets to Galxe ID, you can ensure that your cryptocurrencies and other digital currencies are stored safely and securely. No more worrying about losing access to your funds or falling victim to hacking or phishing attempts.
So how do you get started with Galxe ID? It’s simple! Just follow our step-by-step guide to connect your social media accounts and wallets. First, sign up for a Galxe ID account. Then, navigate to the Settings section and select “Connect Accounts.” From there, choose the social media platforms you want to link and enter your login credentials. Finally, link your wallets by entering the wallet addresses and verifying your ownership.
Once you’ve connected your social media accounts and wallets with Galxe ID, you’ll have access to a range of features and benefits. You can easily switch between your accounts with just a few clicks, view and manage your digital assets, and even schedule posts and updates across multiple platforms. By consolidating your online presence, Galxe ID empowers you to make the most of your social media and digital currency activities.
Don’t waste any more time managing numerous accounts and wallets. Simplify your online life and ensure the security of your digital assets with Galxe ID. Connect your social media accounts and wallets today and experience the convenience and peace of mind that Galxe ID brings. Join the Galxe ID revolution now!
Connect Social Media Accounts and Wallets with Galxe ID
Galxe ID offers a convenient way to connect your social media accounts and wallets in one centralized platform. By linking your accounts, you can manage your online presence and transactions more efficiently.
To get started, follow these simple steps:
- Create a Galxe ID: If you haven’t already, sign up for a Galxe ID account. This will serve as your central hub for all your connected accounts.
- Connect your Social Media Accounts: Once you have your Galxe ID, login and navigate to the “Account Settings” page. Here, you will find an option to connect your social media accounts. You can link your Facebook, Twitter, Instagram, and other accounts to your Galxe ID.
- Sync your Wallets: Next, proceed to the “Wallets” section in your Galxe ID account. You will be able to add and manage your cryptocurrency wallets, as well as link them to your social media profiles. This allows for seamless integration of your wallet balances and transaction history with your social media accounts.
- Manage Permissions and Privacy Settings: With Galxe ID, you have control over what information you choose to share with your connected accounts. Adjust your privacy settings and permissions according to your preferences to ensure your data is shared securely.
- Enjoy the Benefits: Once you have successfully connected your social media accounts and wallets with Galxe ID, you’ll be able to enjoy various benefits. These include easy access to your social media profiles and wallets, simplified management of your online presence, and streamlined transactions across different platforms.
Connecting your social media accounts and wallets with Galxe ID streamlines your online experience and provides a centralized platform to manage your digital presence. Take advantage of this convenient feature and enjoy a seamless integration of your social media and financial activities.
Step 1: Create a Galxe ID Account
To start using Galxe ID and connect your social media accounts and wallets, you will first need to create a Galxe ID account. Follow these simple steps to get started:
- Visit the Galxe ID website at www.galxeid.com.
- Click on the “Sign up” button located at the top right corner of the homepage.
- Fill in the required information, including your name, email address, and a strong password. Make sure to choose a password that is unique and not easily guessable.
- Read and accept the terms and conditions of Galxe ID.
- Click on the “Create Account” button to create your Galxe ID account.
- You will receive a verification email at the email address you provided during sign-up. Open the email and click on the verification link to verify your Galxe ID account.
- Once your account is verified, you will be able to log in to your Galxe ID account using your email address and password.
By creating a Galxe ID account, you will have access to a centralized platform that allows you to connect and manage your social media accounts and wallets in one place. This will make it easier for you to control your online presence and manage your digital assets.
Remember to keep your Galxe ID login credentials secure and avoid sharing them with others to protect your account and personal information.
Step 2: Link Social Media Accounts
After creating your Galxe ID, the next step is to link your social media accounts to your wallet. This will allow you to easily access your social media accounts and interact with them directly from your Galxe ID wallet.
Why link social media accounts?
Linking your social media accounts has several benefits. Firstly, it provides an added layer of security to your Galxe ID. By linking your accounts, you can use multi-factor authentication to verify your identity and protect your wallet from unauthorized access.
Secondly, linking your social media accounts allows for a seamless user experience. Instead of switching between different apps or websites, you can access and manage your social media accounts directly from your Galxe ID wallet.
How to link social media accounts
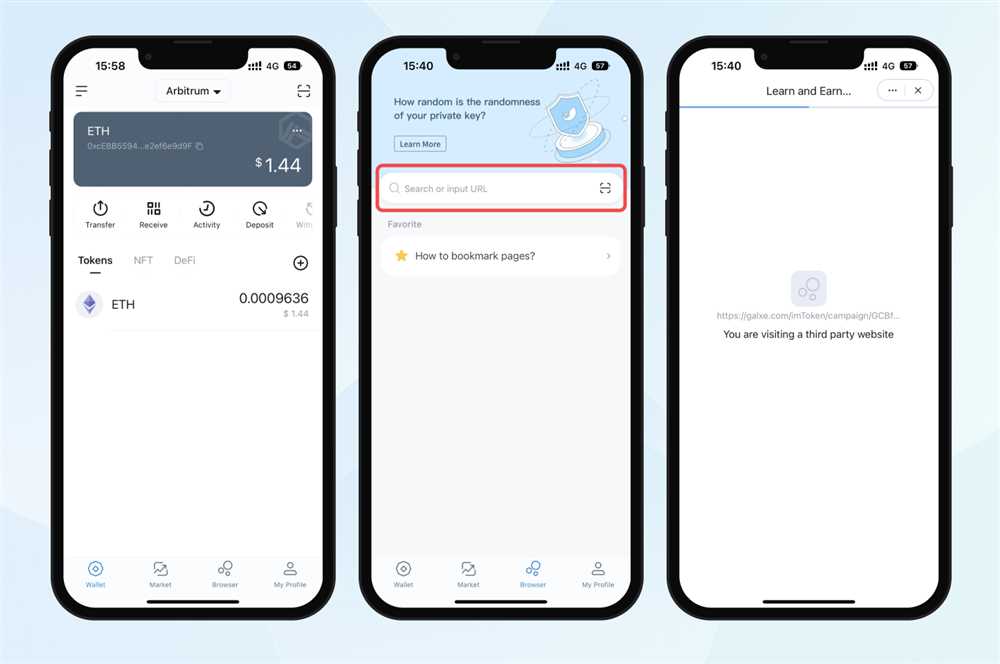
1. Open your Galxe ID wallet and navigate to the settings menu.
2. Look for the “Manage Social Media Accounts” or similar option.
3. Click on the option and a list of supported social media platforms will appear.
| Platform | Linking Process |
|---|---|
| Click on the Facebook icon, log in to your Facebook account, and grant the necessary permissions to link your account. | |
| Click on the Twitter icon, log in to your Twitter account, and authorize the Galxe ID app to access your Twitter account. | |
| Click on the Instagram icon, log in to your Instagram account, and authorize the Galxe ID app to access your Instagram account. | |
| Click on the LinkedIn icon, log in to your LinkedIn account, and authorize the Galxe ID app to access your LinkedIn account. |
4. Repeat the process for any other social media platforms you wish to link to your Galxe ID wallet.
Once your social media accounts are linked, you can easily switch between accounts and access their features directly from your Galxe ID wallet. This integration provides a convenient and secure way to manage your social media presence while enjoying the benefits of blockchain technology.
Step 3: Link Wallets
Once you have successfully connected your social media accounts to your Galxe ID, the next step is to link your wallets. This will allow you to easily manage and access your cryptocurrency assets directly from your Galxe ID.
To link your wallets, follow these simple steps:
1. Choose Your Wallet Provider
The first step is to select the wallet provider that you want to link with your Galxe ID. You have the option to choose from a variety of popular wallet providers such as MetaMask, Trust Wallet, Ledger, and many others.
Note: Make sure that you have already set up an account with your chosen wallet provider before proceeding to the next step.
2. Access Your Wallet Settings

Once you have chosen your wallet provider, navigate to the settings or account section of your wallet. Look for an option that allows you to connect or link external accounts or applications.
Note: The exact steps may vary depending on the wallet provider you are using. If you are unsure about how to access your wallet settings, refer to the official documentation or support resources provided by the wallet provider.
3. Connect Your Galxe ID
Within the wallet settings, locate the option to connect external accounts or applications. Click on this option and select Galxe ID from the list of available options.
Note: You may be asked to enter your Galxe ID credentials or authorize the connection with your Galxe ID. Follow the on-screen instructions to complete the process.
4. Confirm the Connection

After connecting your Galxe ID, you may need to confirm the connection within your wallet. Follow any additional prompts or instructions that appear on your screen to complete the linking process.
Note: Depending on the wallet provider, you may need to sign a message or provide additional verification to confirm the connection.
Once you have completed these steps, your wallet will be successfully linked to your Galxe ID. You can now easily manage your cryptocurrency assets and make transactions directly from your Galxe ID dashboard.
Step 4: Verify Connected Accounts
Once you have connected your social media accounts and wallets with Galxe ID, the next step is to verify these connections. Verifying your connected accounts adds an extra layer of security to your Galxe ID and ensures that only you have access to your accounts.
To verify your connected accounts, follow these steps:
1. Open the Galxe ID app.
2. Go to the “Account Settings” section.
3. Select the “Connected Accounts” option.
4. You will see a list of all the accounts you have connected.
5. To verify the connection, click on each account one by one.
6. Follow the instructions provided by each platform to complete the verification process.
7. Once you have successfully verified all your connected accounts, you will see a green checkmark next to each account.
8. Congratulations! Your connected accounts are now verified and secure.
Remember to regularly check your connected accounts and update your security settings to keep them safe from any potential threats.
Note: If you encounter any issues during the verification process, make sure you have followed the instructions correctly. If the problem persists, reach out to the Galxe ID support team for assistance.
Step 5: Enjoy Seamless Integration
Once you have successfully connected your social media accounts and wallets with Galxe ID, you can start enjoying the benefits of seamless integration. This means that you can easily interact with your social media platforms and manage your cryptocurrency transactions all in one place.
Here are some key features of seamless integration with Galxe ID:
1. Social Media Integration
Galxe ID allows you to connect your social media accounts, such as Facebook, Twitter, and Instagram. This integration enables you to post updates, share content, and interact with your friends and followers directly from the Galxe ID platform.
2. Wallet Integration

You can also integrate your wallets with Galxe ID, including popular options like MetaMask, Trust Wallet, and Coinbase Wallet. This allows you to securely store and manage your cryptocurrencies, track your portfolio, and easily initiate transactions, all within the Galxe ID interface.
3. Single Sign-On
With Galxe ID, you no longer need to remember multiple login credentials for your social media accounts and wallets. Once you have connected them with Galxe ID, you can use it as a single sign-on solution. This means that with just one set of login credentials, you can access and manage all your integrated accounts.
4. Streamlined User Experience
Galxe ID provides a streamlined user experience by bringing together your social media networks and cryptocurrency wallets. This eliminates the need to switch between multiple apps or tabs, saving you time and effort. You can seamlessly navigate between your social feeds, crypto investments, and transaction histories all within the Galxe ID platform.
By enjoying the benefits of seamless integration with Galxe ID, you can enhance your social media experience and simplify your cryptocurrency management. So, connect your accounts and wallets today and start enjoying a more convenient and efficient way to navigate the digital world.
Question-answer:
What is Galxe ID?
Galxe ID is a digital identity platform that allows users to connect their social media accounts and wallets in one place. It provides a seamless and secure way to manage and use various online services.
Is Galxe ID safe to use?
Yes, Galxe ID is designed with a strong emphasis on security and privacy. The app uses encryption to protect your personal information and ensures that only authorized users can access your accounts. Additionally, Galxe ID does not store any account passwords or personal data on its servers.